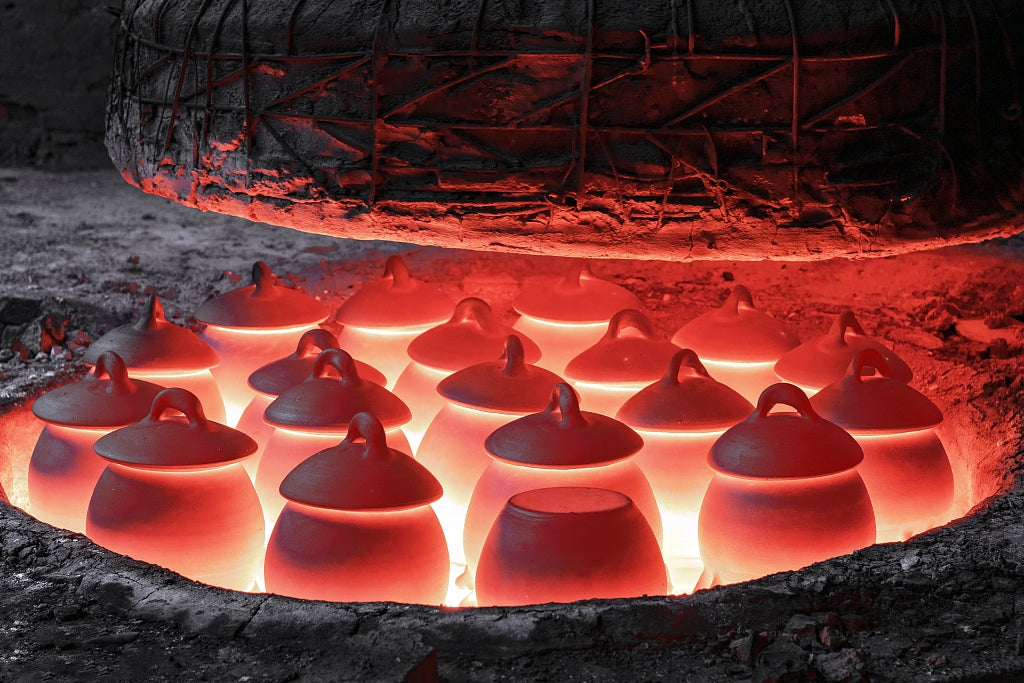
The Art of Ceramics: How Pottery is Made
Ceramics have been an integral part of human civilization for thousands of years, serving both practical and artistic purposes. From ancient pottery to modern-day masterpieces, the process of creating ceramics is a fascinating blend of science and art. But how exactly are these beautiful objects made? Let's take a journey through the intricate process of ceramic production.

1. The Raw Materials: Clay and More
The journey of ceramics begins with the raw materials, primarily clay. There are various types of clay, each with unique properties that affect the final product. Common types include earthenware, stoneware, and porcelain. These clays are often mixed with other natural materials like feldspar and silica to enhance their properties.
2. Preparing the Clay
Before the clay can be shaped, it must be prepared. This involves several steps:
- Wedging: The clay is kneaded to remove air bubbles and ensure a consistent texture. This step is crucial to prevent cracks during firing.
- Aging: Sometimes, the clay is left to age for a period, which can improve its plasticity and workability.
3. Shaping the Clay
Once the clay is ready, it's time to shape it into the desired form. There are several methods to do this:
- Hand Building: This traditional method involves shaping the clay by hand using techniques like pinching, coiling, and slab building.
- Wheel Throwing: Using a potter's wheel, the clay is spun while the potter shapes it with their hands and tools. This method is often used to create symmetrical pieces like bowls and vases.
- Slip Casting: For more intricate designs, liquid clay (slip) is poured into molds and left to harden.
4. Drying the Clay
After the clay is shaped, it needs to dry slowly and evenly to prevent cracking. This can take anywhere from a few days to several weeks, depending on the size and thickness of the piece. The drying process is critical because any remaining moisture can cause the piece to explode during firing.

5. Bisque Firing
The first firing, known as bisque firing, transforms the dried clay into a porous, durable state. This is done in a kiln at temperatures ranging from 1,800 to 2,000 degrees Fahrenheit. Bisque firing removes any remaining water and organic materials, making the piece ready for glazing.
6. Glazing
Glazing adds color, texture, and a glass-like finish to the ceramic piece. Glazes are made from a mixture of minerals and are applied by dipping, brushing, or spraying. The piece is then left to dry before the final firing.
7. Glaze Firing
The second firing, called glaze firing, melts the glaze and creates a smooth, glassy surface. This firing is typically hotter than the bisque firing, reaching temperatures between 2,100 and 2,400 degrees Fahrenheit. The result is a beautifully finished ceramic piece, ready for use or display.
8. Finishing Touches
After the glaze firing, some pieces may require additional finishing touches. This could include adding decorative elements, polishing, or even a third firing for special effects like luster or decals.

The Beauty of Ceramics
The process of creating ceramics is both labor-intensive and rewarding. From the raw clay to the final glazed piece, each step requires skill, patience, and creativity. The result is a unique work of art that can be cherished for generations.
Whether you're sipping coffee from a handcrafted mug or admiring a beautifully glazed vase, remember the intricate process that brought that piece to life. Ceramics are more than just objects; they are a testament to the enduring human spirit of creativity and craftsmanship.